Elementor sites have a misunderstood reputation for being slow. Yes, Elementor appears to have a lot of extra code, loads unused assets, and can produce bloated page structures. But the problem isn’t Elementor itself. It’s how most people use it.
Does Elementor Actually Slow Down Your Site?
Yes and no.
Elementor adds overhead compared to a completely custom coded site. Every page builder does. But the performance gap between a slow Elementor site and a fast one usually comes down to a few common mistakes:
- Using the old section/column structure instead of Flexbox containers
- Loading massive uncompressed images
- Running too many plugins
- No caching
- Cheap hosting with slow server response times
Fix these issues and Elementor performs fine. Ignore them and you’ll struggle to break 60 on PageSpeed.
The techniques below are ordered by impact. Start at the top and work down.
1. Switch to Flexbox Containers
This is the single biggest performance improvement you can make in Elementor.
The old section-and-column layout wraps everything in extra div elements. A simple two-column section might generate five or six nested divs. Multiply that across an entire page and you get a bloated DOM that slows rendering.
Flexbox containers cut this dramatically. The same layout needs fewer wrapper elements, which means:
- Smaller HTML output
- Faster DOM parsing
- Better Core Web Vitals scores
How to switch:
If you’re starting a new site, Flexbox containers are already the default. If you have an existing site built with sections, Elementor includes a conversion tool:
- Edit any page in Elementor
- Hover over a section and click the edit icon
- In the settings, click “Convert to containers”
- Review the converted container and delete the original section
Convert pages one at a time and check that layouts still look correct.
Impact: High. Sites converting from sections to containers often see 20-30% improvement in performance scores.
2. Optimise Your Images
Images are usually the largest files on any page. An unoptimized hero image can be 2-3MB alone – larger than everything else combined.
Compression:
Run every image through compression before uploading. Tools like TinyPNG, ShortPixel, or Imagify reduce file sizes by 50-80% with minimal visible quality loss.
For ongoing optimisation, install a WordPress plugin that compresses images automatically on upload. Imagify and ShortPixel both offer this.
Format:
Use WebP instead of JPEG or PNG where possible. WebP files are typically 25-35% smaller at equivalent quality. Most modern browsers support WebP, and WordPress can serve fallbacks for older browsers.
Sizing:
Don’t upload a 4000px wide image for a container that’s only 600px wide. Resize images to match their display size. Elementor’s responsive image features help, but starting with appropriately sized files is better.
Lazy loading:
Lazy loading defers offscreen images until the user scrolls to them. This improves initial page load significantly on image-heavy pages.
Elementor includes lazy loading in its settings. Alternatively, caching plugins like WP Rocket handle this automatically.
One exception: Don’t lazy load your hero image or anything above the fold. These should load immediately to avoid layout shifts and blank spaces on initial render.
Impact: High. Proper image optimisation often cuts total page weight by 50% or more.
3. Install a Caching Plugin
Without caching, WordPress generates each page from scratch on every visit — querying the database, running PHP, assembling HTML. This takes time.
Caching plugins generate static HTML versions of your pages and serve those instead. The result is dramatically faster load times, especially on shared hosting.
Recommended options:
- WP Rocket: Premium, but the easiest to configure. Handles caching, minification, lazy loading, and more in one plugin.
- FlyingPress: Performance-focused, lightweight, excellent results.
- LiteSpeed Cache: Free and extremely fast if your host runs LiteSpeed server.
- W3 Total Cache: Free, powerful, but more complex to configure.
If you’re unsure, WP Rocket or FlyingPress are the safest choices. Install one, enable the default settings, and you’ll see immediate improvement.
Impact: High. Caching alone can cut load times by 40-60%.
4. Use a CDN
A Content Delivery Network stores copies of your site’s files on servers around the world. When someone visits your site, assets load from the server closest to them rather than your origin server.
For visitors far from your hosting location, this significantly reduces latency.
Options:
- Cloudflare: Free tier available, easy setup, includes basic security features.
- BunnyCDN: Cheap, fast, pay-as-you-go pricing.
- RocketCDN: Integrates directly with WP Rocket.
If you’re on Cloudways or a managed WordPress host, CDN might already be included. Check your hosting dashboard.
Impact: Medium to high, depending on your audience location. If most visitors are in one region close to your server, impact is smaller. Global audience = bigger benefit.
5. Minify and Combine CSS/JavaScript
Minification removes whitespace, comments, and unnecessary characters from code files. Combining merges multiple files into fewer requests.
Both reduce the amount of data transferred and the number of HTTP requests, which speeds up loading.
Most caching plugins handle this automatically:
- WP Rocket: Enable minify and combine options in File Optimization settings
- FlyingPress: Enabled by default
- LiteSpeed Cache: Enable under Page Optimization
Warning: Combining JavaScript can sometimes break functionality if scripts load in the wrong order. If something stops working after enabling this, try disabling JS combination while keeping CSS combination enabled.
Impact: Medium. Usually a 10-20% improvement in file transfer size.
6. Remove Unused CSS
Elementor loads its global stylesheet on every page, including styles for widgets you might not even use. This adds unnecessary weight.
Option 1: Elementor’s built-in features
Go to Elementor → Settings → Performance and enable:
- Improved Asset Loading
- CSS Print Method: External File
These help Elementor load assets more efficiently.
Option 2: Third-party cleanup
Plugins like Perfmatters or Asset CleanUp let you disable specific scripts and styles on a per-page basis. This takes more effort but gives finer control.
For example, if you only use a contact form on one page, you can disable the form plugin’s CSS/JS on all other pages.
Impact: Medium. Can shave 100-300KB of unused CSS from page loads.
7. Disable Unused Elementor Widgets
Elementor includes dozens of widgets, and each one adds code even if you never use it. The Element Manager lets you disable widgets you don’t need.
How to access it:
- Go to Elementor → Settings → Features
- Scroll down to Element Manager
- Click the toggle to open it
- Uncheck any widgets you don’t use
For example if you never use the Tabs or Accordion widgets, disable them. Same for any widgets you’ve replaced with third-party alternatives.
Impact: Low to medium. Every disabled widget reduces the code Elementor loads.
8. Limit Third-Party Plugins
Every plugin adds code to your site. Some add frontend scripts that load on every page — even when unnecessary.
Common offenders:
- Social sharing plugins
- Slider plugins
- Chat widgets
- Analytics plugins (some load heavy scripts)
- Page builder addons you don’t actively use
Audit your plugins:
- List every active plugin
- For each one, ask: “Do I actually need this?”
- Deactivate and delete anything non-essential
For plugins you do need, check if they’re loading assets globally when they shouldn’t. Contact forms, for instance, should only load scripts on pages with forms — not sitewide.
Impact: Varies. Removing one bloated plugin can improve scores more than five other optimisations combined.
9. Optimise Google Fonts
Google Fonts are convenient but add external requests that can slow rendering. Each font weight and style is a separate file.
Reduce font variations:
Only load the weights you actually use. If you only need Regular (400) and Bold (700), don’t load Light, Medium, Semi-Bold, and Black as well.
In Elementor, go to Site Settings → Global Fonts and remove any unused variations.
Host fonts locally:
Instead of loading fonts from Google’s servers, you can host them on your own server. This eliminates the external DNS lookup and connection time.
Plugins like OMGF (Optimize My Google Fonts) or Perfmatters can download Google Fonts and serve them locally with one click.
Impact: Low to medium. Reduces render-blocking resources and external requests.
10. Upgrade Your Hosting
All the optimisation in the world won’t fix bad hosting.
Signs your hosting is the bottleneck:
- Time to First Byte (TTFB) over 500ms
- Slow response even on simple pages
- Performance issues that no plugin seems to fix
What to look for:
- Modern PHP version (8.1+)
- LiteSpeed or Nginx server
- SSD storage
- Server-level caching
- Adequate resources (not oversold shared hosting)
Recommended hosts for Elementor:
- Cloudways: Managed cloud hosting, good performance, reasonable price
- Kinsta: Premium managed WordPress, excellent performance
- SiteGround: Good balance of price and performance
Cheap shared hosting (under $5/month) is almost always the limiting factor for slow Elementor sites. Moving to proper hosting often makes more difference than every other optimisation combined.
Impact: High if your current hosting is poor. Minimal if you’re already on decent hosting.
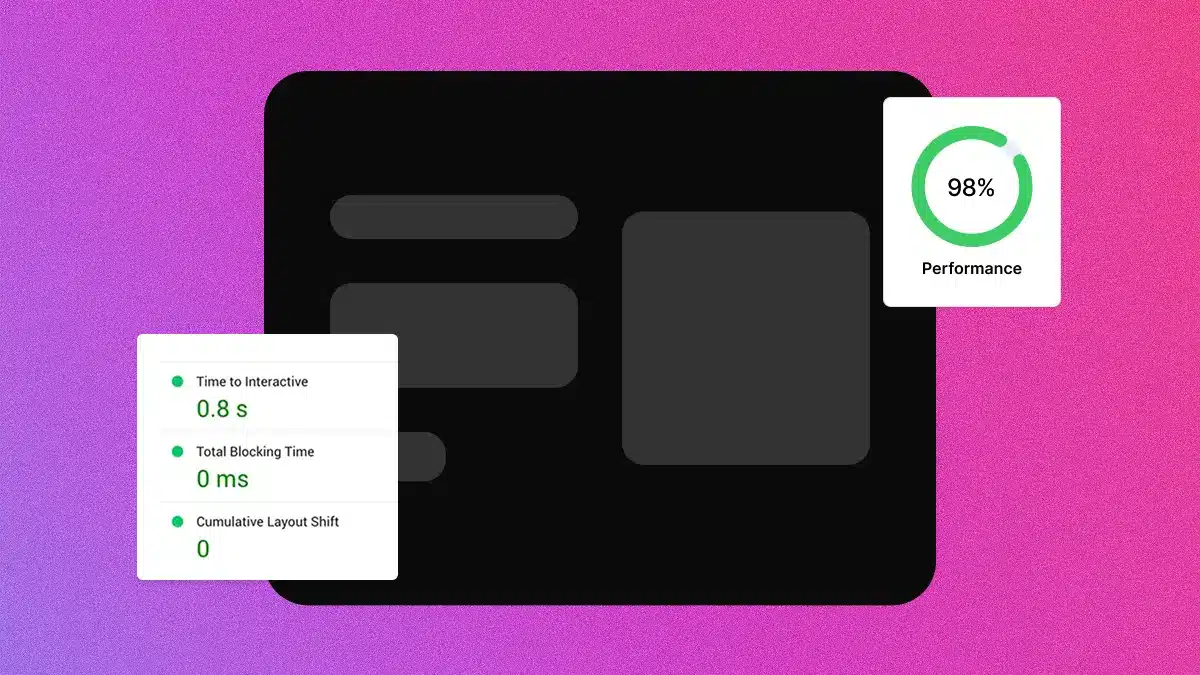
Measuring Your Results
After making changes, test your site speed to confirm improvements.
Tools:
- PageSpeed Insights (pagespeed.web.dev): Google’s official tool, shows Core Web Vitals
- GTmetrix: Detailed waterfall analysis, shows exactly what’s loading
- WebPageTest: Advanced testing with multiple locations and devices
Key metrics to watch:
| Metric | Target |
| Largest Contentful Paint (LCP) | Under 2.5 seconds |
| Total Blocking Time (TBT) | Under 200ms |
| Cumulative Layout Shift (CLS) | Under 0.1 |
| Total page size | Under 1.5MB |
| HTTP requests | Under 50 |
Test both desktop and mobile. Mobile is usually slower and is what Google uses for ranking.
Quick Wins Checklist
If you want fast results, prioritise these:
- Switch to Flexbox containers (or confirm you’re already using them)
- Compress all images and convert to WebP
- Install WP Rocket or FlyingPress
- Enable Cloudflare CDN
- Disable unused Elementor widgets
- Remove plugins you don’t need
- Check that hosting TTFB is under 500ms
Most Elementor sites can hit 80+ on PageSpeed with just these basics done properly.
Wrapping Up
Elementor doesn’t have to be slow. The page builder gets blamed for performance issues that are usually caused by unoptimised images, missing caching, bloated plugins, or cheap hosting.
Start with the high-impact fixes: Flexbox containers, image optimisation, caching, and a CDN. These four changes alone will transform most slow Elementor sites.
Once the basics are covered, work through the remaining optimisations based on what your testing reveals. Not every site needs every fix — focus on whatever is actually slowing yours down.
